Closing a Job (continued)
Note: All Job Tasks must be approved to be able to close the Job.
1. Open the Job to be closed.
2. From the Job toolbar, click the Tasks button. At the lower left of the Tasks form click the Close Job button.
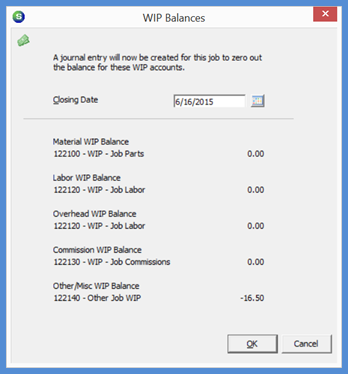
3. If your company is using WIP (Work in Process accounts) and any costs have been posted to the Job after the final invoicing was completed, there may be amounts remaining in the WIP accounts. If this is true, the WIP Balance form will be displayed showing the amounts remaining in WIP that will move to the appropriate Cost of Goods/Expense accounts. The application will perform this recording to the G/L automatically; click the OK button to continue.
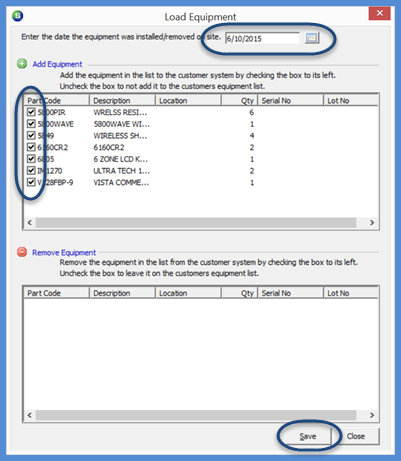
4. The Load Equipment form will be displayed. At the top of the form enter the date on which the equipment was installed. The upper tier of the form lists all the inventory parts used on the Job. To the left of each part is a checkbox indicating this part is a serviceable part and should be loaded to the Systems Equipment list for future servicing of the system. This checkbox defaults from the Part setup. If any parts in the list should not be saved with the System Equipment List, un-check the checkbox to the left of those parts.
Click the Save button located at the lower right of the form.
![]() DO NOT click on the Close button - I this is accidentally done, the parts will NOT load to the System Equipment List and you will have to be manually add them to the System from the Customer Explorer.
DO NOT click on the Close button - I this is accidentally done, the parts will NOT load to the System Equipment List and you will have to be manually add them to the System from the Customer Explorer.
FRM 10074 FRM 10072
Previous Page Page 2 of 4 Next Page