Report Manager Accounts Payable Reports
The Print 1099 Report is used to print the 1099 forms to submit to your 1099 Vendors and to the Internal Revenue Service. The report is designed to print on the pre-printed IRS form 1099-MISC. The payments made to 1099 Vendors will print in box 7 of the form; Nonemployee Compensation. This report does not print the form itself, it prints the information on the pre-printed 1099-MISC form. Make certain to load the pre-printed forms into the printer prior to pressing the Print button.
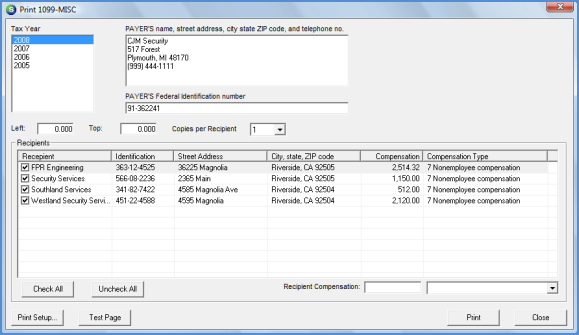
Report Selections
When the 1099 Report Selections form is opened, a list of all payments made to Vendors flagged as a 1099 Vendor will be displayed in the grid area of the form along with the total amount of payments made to each Vendor for the selected Tax Year. The compensation amount for a Vendor may be modified if needed.
To modify the Compensation Amount for a Vendor, highlight the Vendor name in the grid, then in the Recipient Compensation amount field at the lower right of the form, type in the amount.
Tax Year - Highlight the Tax Year for which the 1099's will be printed.
Payers Information - The Payer Information will auto-fill from the information saved in the SedonaSetup table Company Setup. Information in this field may be modified if necessary.
Payers FIN - Type in your company's Federal Identification Number.
Margin Settings - If after printing a test page, adjustments need to be made to align the report on the pre-printed form, the User may enter values into the Left or Top margins fields to attain the proper alignment.
· Left
· Top
Copies per Recipient - The default is to print 1 copy; the User may change this value if multiple copies will be printed for each Recipient (Vendor).
Print Setup - Press the Print Setup button to select the Printer that will be used for printing the 1099's.
Test Page - When ready to print, press the Test Page button. Make certain the printer has been loaded with the pre-printed 1099-MISC forms. After the test page has printed, review the alignment to make certain the data printed in the boxes on the forms is legible. If alignment adjustments need to be made, enter values in the Left or Top fields, then print another test page to verify the adjustment settings are correct. Since each printer works differently, the User may have to make several adjustments and print test pages until the printing aligns correctly on the pre-printed form.
Once the alignment is correct, press the Print button located at the lower right of the form.
Report163