Accounts Payable Vendors Creating a New Vendor
Follow the instructions below to create a new Vendor record.
1. Navigate to the Main Application Menu and select Accounts Payable/Vendors.
2. The Vendors List will be displayed. At the lower right of the form press the New button.
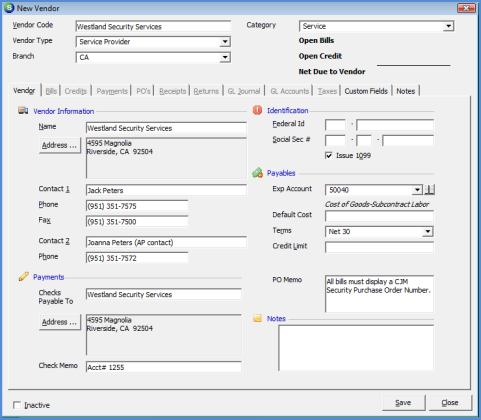
3. The New Vendor form will be displayed. This form is divided into three tabs available for data entry; Vendor, and Custom Fields. Each data entry form and the fields on each form will be described below and on the subsequent pages.
4. Once all information has been entered, press the Save button located at the lower right of the New Vendor form.
Vendor Form
The Vendor form is divided into several sections, each of which is described below; Vendor Header, Vendor Information, Payments, Identification, Payables and Notes.
Vendor Header
The fields within the Vendor Header are used to identify the Vendor and select defaults that will be used for accounts payable data entry.
Vendor Code – This is the code under which the Vendor record is saved and utilized when searching for Vendor records. It is not recommend numeric values be used since most of the accounts payable reports group on the Vendor Code. This field has a 25 character limit. If the Vendor has a longer name than 25 characters, this may be abbreviated and the full Vendor name may be entered in the Name field (see Vendor Information on page 2).
Vendor Type – Select the appropriate code from the drop-down list.
Branch – Select the default branch from the drop-down list. This may be overridden when creating bills and purchase orders.
Category – Select the default category from the drop-down list. This may be overridden when creating bills and purchase orders.
6000